Containers and the fleet
Dumpster inventory
Dumpster Inventory is the fleet by the numbers: how many containers you own, and what each one is doing.
The row across the top splits the whole fleet into available, on rent, in maintenance and out of service, with the percentage of the fleet each accounts for.
Under it, one card per size shows the same split for that size, with a dial for how much of it is out. View assets drills into the individual containers.
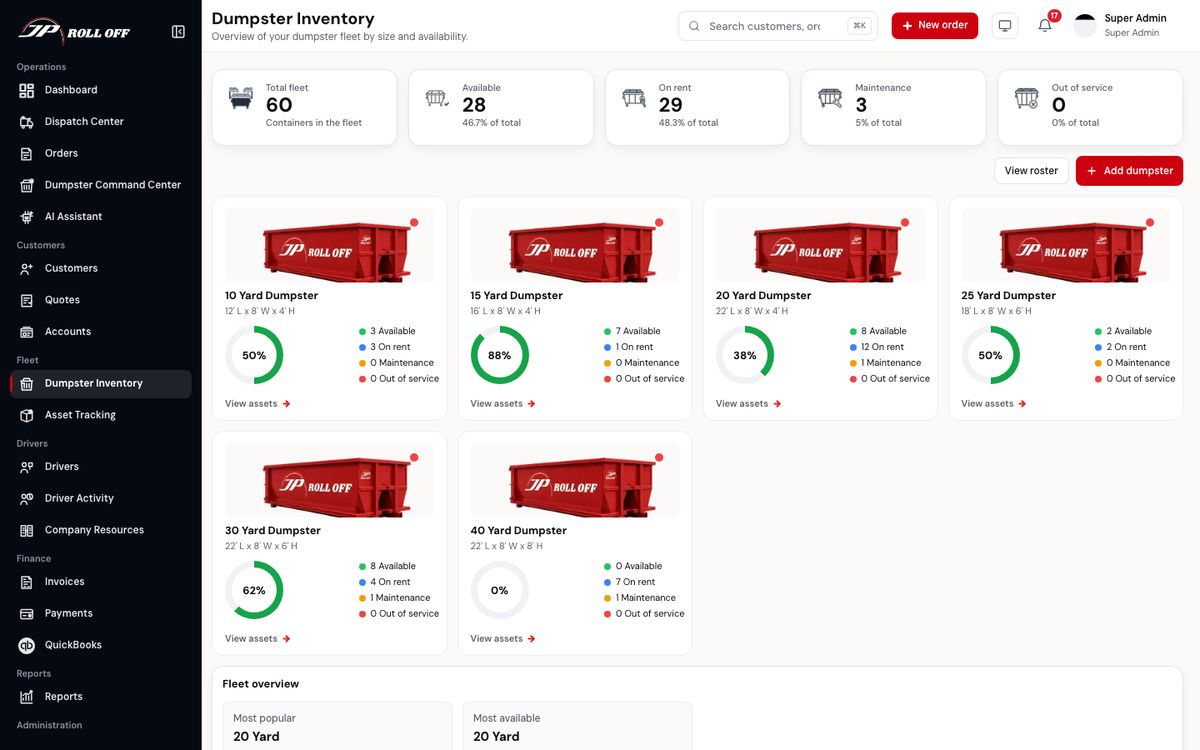
The card dial is how much of that size is on rent — 38% of the 20 yards here.
This is the screen that answers "have we got a 30 free for Thursday?"
Dumpster Command Center
Dumpster Command Center is the same fleet on a map, in real time, and it's built around one question: what's been sitting somewhere too long?
Pins are coloured by rental age — under 14 days, 14–29, 30–59, and 60 or more. The filters down the left narrow by size, rental age, material or customer.
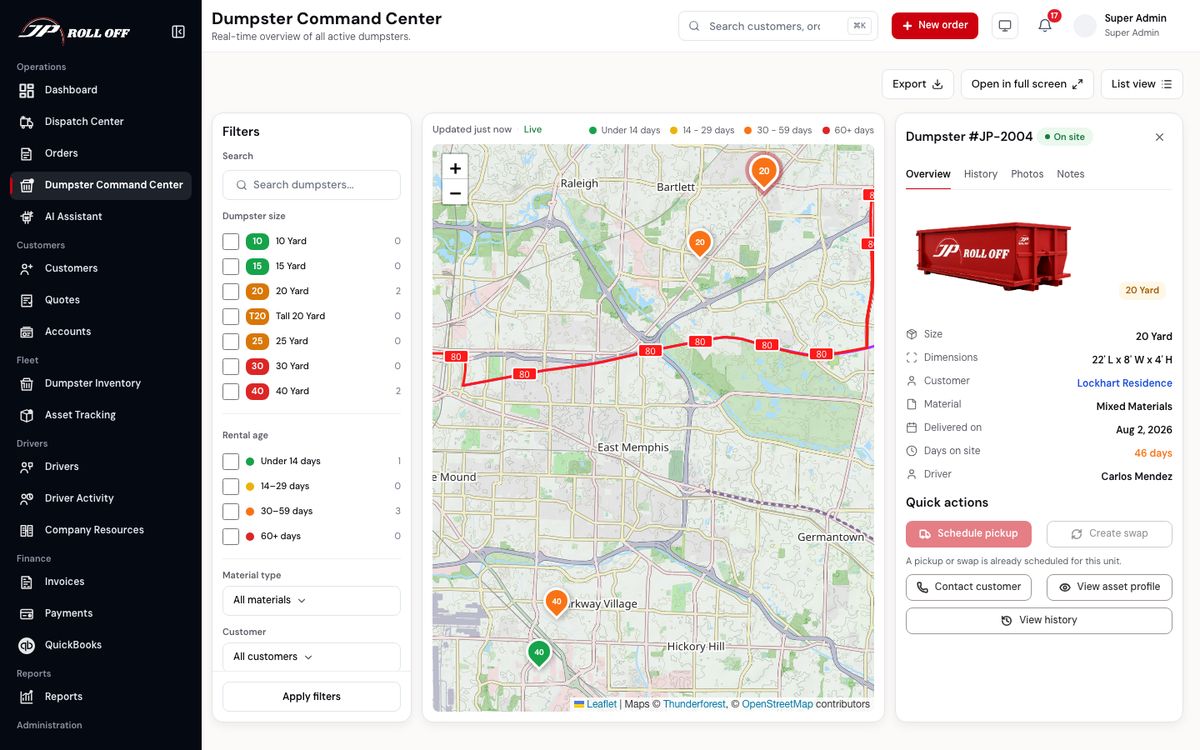
A selected container opens its own panel: where it is, whose it is, and how long it's been there.
The panel on the right carries the container's size and dimensions, the customer, the material in it, when it was delivered, days on site, and which driver dropped it. Its tabs hold that unit's history, photos and notes.
Quick actions there let you schedule a pickup or create a swap without going to the order form. Pick the service date first. Tomorrow or a later day, including the following week. Nothing is booked until that date is chosen. If one is already booked for that unit, the buttons say so rather than letting you book a second. To change the size or material on the way, use Quick swap on the order instead (see Orders).
Rate cards
In Settings → Catalogs → Rate cards, each dumpster size has a Standard price for a zone and ZIP prefix. Open Add rate card, leave Material as Standard for that price, or pick a material to set a different price for the same size. A quote or order uses the material price when one is saved, and the standard price when it is not. Several ZIP prefixes can share that one price. Type them in ZIP prefixes, separated by a comma, such as 209, 207.
Dump-site ticket setting
In Settings → Catalogs → Dump sites, each site shows whether a dump ticket is required. Open Ticket setting to change it. When a job is assigned that site, the driver app uses this setting at the dump stop. Material types that already require a weight ticket continue to do so as well.
Asset tracking
Asset Tracking is your trucks: where each one is, who's driving it, and what's happened to it.
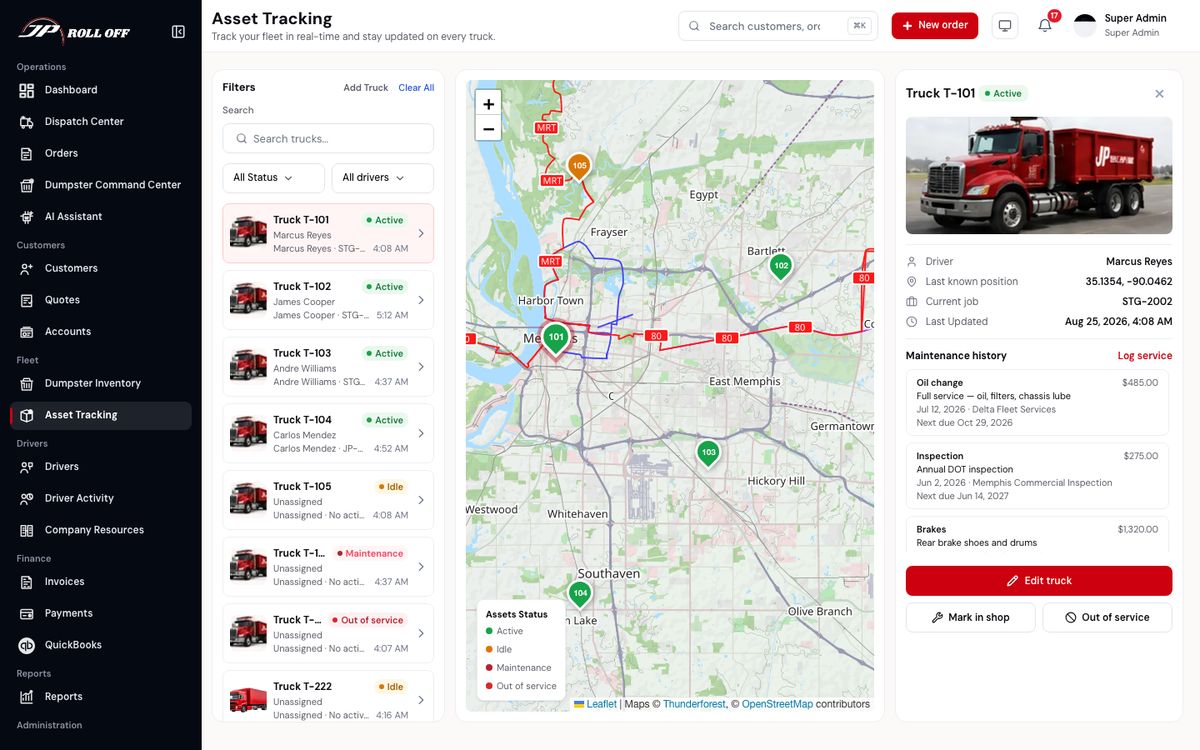
Open a truck to see its Maintenance history. Log service records work done on it: the type, date, cost, who did it, and when it's next due.
Export history downloads that truck's service record as a spreadsheet, for the mechanic, the insurer or a buyer. Export maintenance, at the top of the list, does the same for every truck in one file. Both ask which period first: this year (the default), one of the four years before, your own dates, or all history. The file name says which, for example maintenance_truck-12_2025.csv. Each row has the unit, the truck, the date, the type of work, the description, the cost, who did it and when it's next due.
Retiring a truck
When a truck is sold or scrapped, open it and choose Retire truck. It leaves the fleet: it stops appearing in the list and anywhere work is assigned, and its driver is unassigned.
Trucks are retired rather than deleted on purpose. Its maintenance history and past jobs stay, so a truck sold in March is still on that year's maintenance export. To find one again, set the status filter to Retired. Return to fleet puts it back if it was retired by mistake.
Next: Drivers